Analytics » Sharing and Collaboration » Sharing Views to a Group
Sharing to a Group
To enable easy collaboration Virtutem Analytics supports the concept of Groups. You can create a Group which contains a set of users (for shared users) and share reports/dashboards with the required permissions as you do for a individual user. Groups will really be helpful when you want to share the same reports and grant the same permissions to a set of users. In such scenarios you could create a group and do the same easily, instead of sharing to each user individually.
The Administrator or Database Owner can add/edit a group. As a group owner, you will be able to see all the users in the group who have been granted access to your database and can edit the granted permissions as well. Currently Virtutem Analytics supports the creation of only one Group per reporting database. This group is called a Database Group and identified by the name dbgroup.
Invoke the option Share -> Add/Edit Database Group in the tool bar. A dialog box appears as shown below:
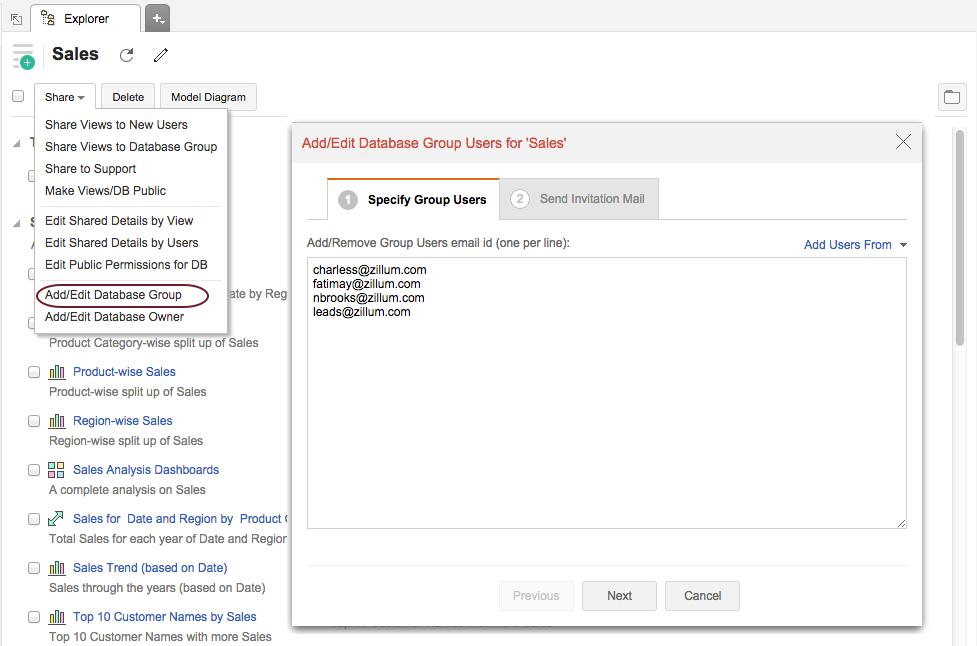
In the Specify Group Users tab, add the Users (whom you want to associate in the group) by providing the email addresses or Virtutem Analytics User Id of the users with which they have registered their Virtutem Analytics account.
You can add users using Add Users From option, which provides you with the options to pick users from the following contacts lists.
- Existing Shared Users
- Zoho Contacts
- Google Contacts
- Google Apps Users
Each of these options are also is explained in detail under Sharing Views to a User topic.
You can remove a user from the group by deleting his/her email address from the list.
Once you have included the users, click on the Next button to go to the Sending Invitation Mail tab, which will look as below:
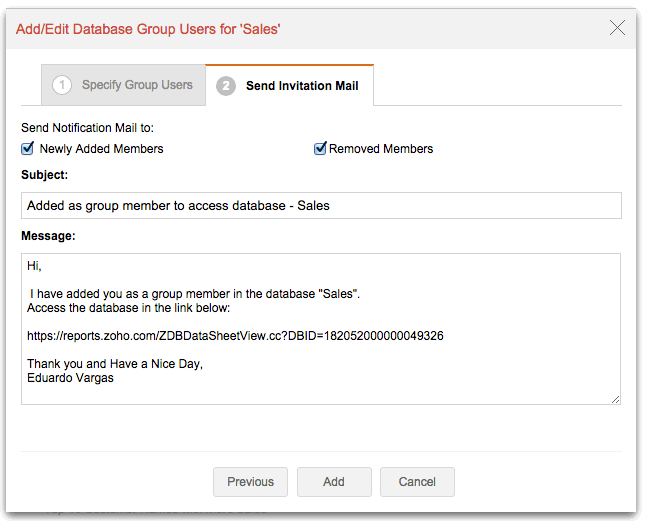
In this tab you can send Invitation mails to the group members, with a link to access the shared views. In the Subject box and Message box, you could type your own subject and message.
Additionally, by checking on the Removed Members option, user(s) removed from this group will also be notified. Click Add to complete the process.
Look for the message " Group Users have been successfully added. Notification email has been sent to the users " appearing on the top right corner, confirming the process.
Once you are done creating a group, you can start sharing your views (tables/reports/dashboards) to the group.
To share a view(s) you can invoke the Share option using any of the following options
- From Explorer tab of the reporting database, select the views that need to be shared and invoke the Share -> Share Views to Database Group option in the toolbar
- Open the corresponding view that needs to be shared and invoke the Share -> Share this View to Database Group option in the toolbar
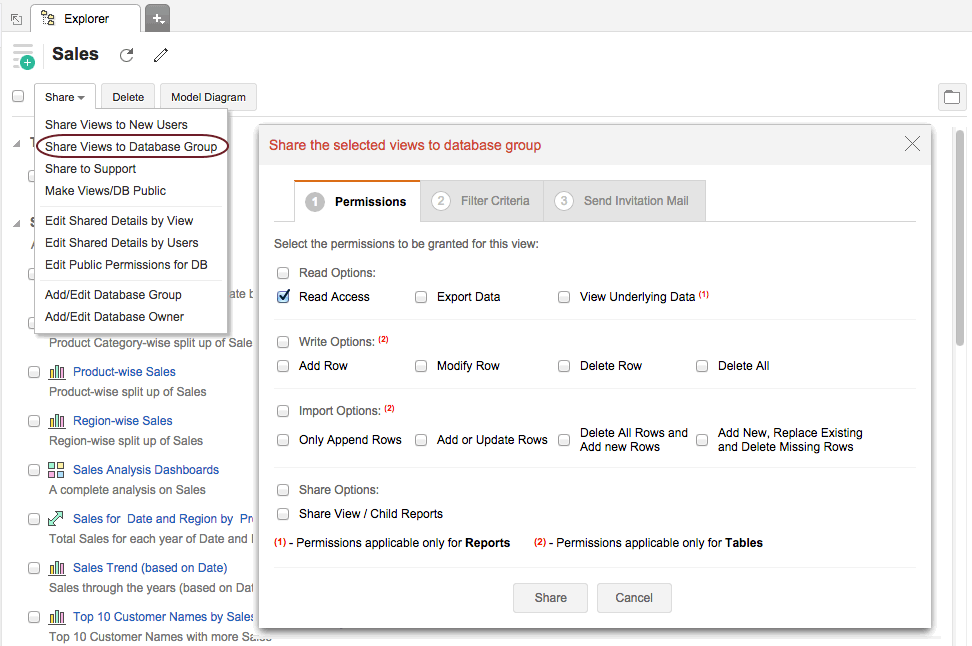
You can grant required permissions to the group for the selected view(s) using Permissions tab and can send invitation mails by using Send Invitation Mail tab. Refer the topic Granting Permissions to Users for more information on the various permissions that could be granted to the group.
You can also edit previously granted permissions to a database group by using Share -> Editing existing shared details option in the toolbar. Refer to the topic Editing existing shared details for more information.
Note: |
|---|
While referring to the topics, remember that dbgroup would be the name that indicates a Database Group. |